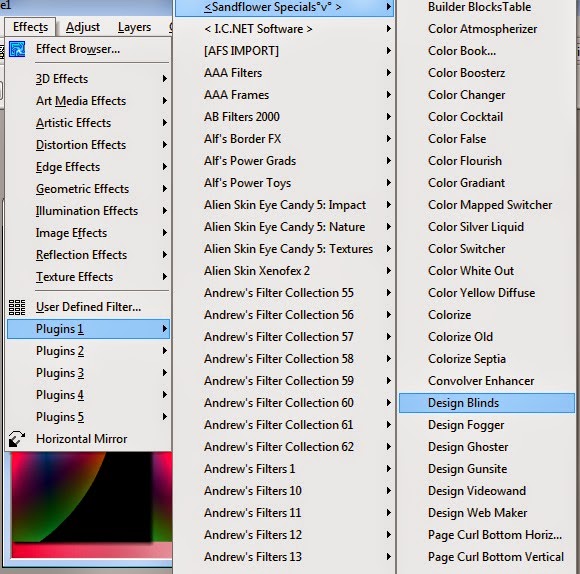
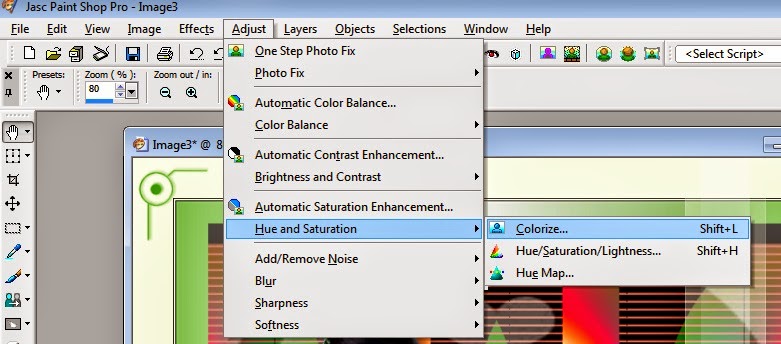
Plugins:
Andrew Filter 56 - A bit left over gradient
Alf’s Powers toy - Split Distortion
Grafic plus-Horizontal mirror
Sandflower Specials- Design blind
Alien Skin ( Eye Candy 5 İmpact )- Perspective shado
Plugıns here:
This tutorial created with PSP x 9
Before open your tubes and mask in to PSP
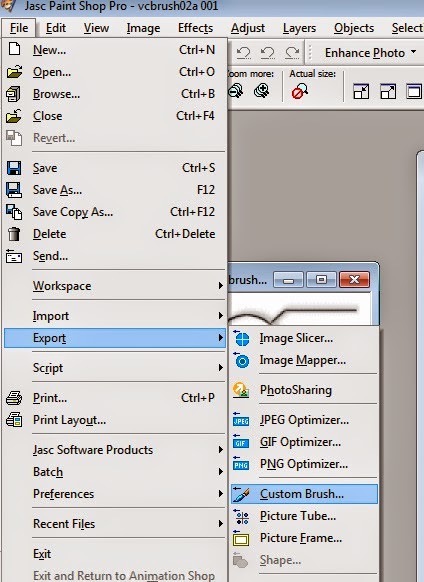
Save brushs
You can change blend modes according to you color
So let’s start
1- File-New- Open new image 800 x 550
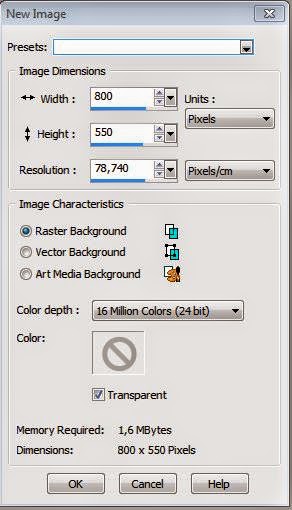
Set your foreground color to #f8f7f1 ( Light color)
Set your background color to #b5012b ( Dark color)
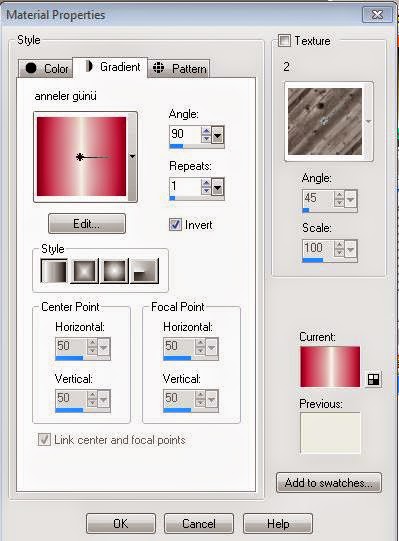
2- Fill with gradient
3-Layers- Duplicate
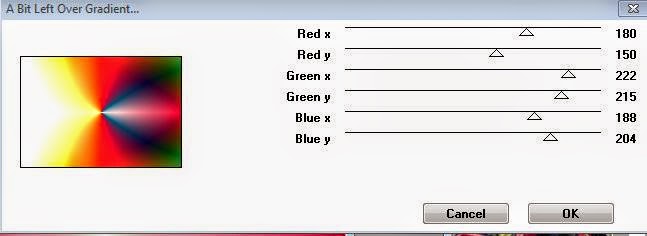
4- Effects- Andrew Filter 56 - A bit left over gradient
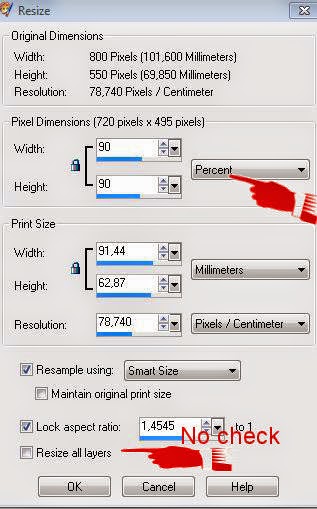
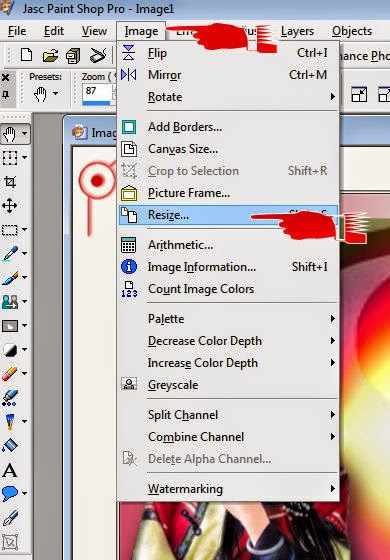
5- İmage- Resize 90
6- Layers-Duplicate
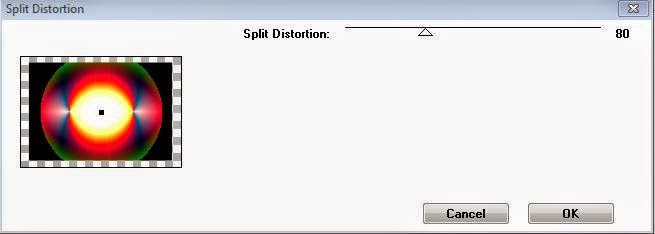
7- Alf’s Powers toy - Split Distortion
8-Layers-Dublicate
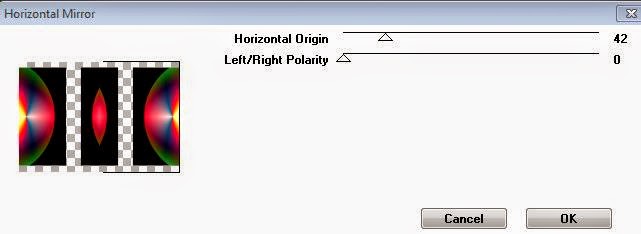
Effects- Grafic plus-Horizontal mirror
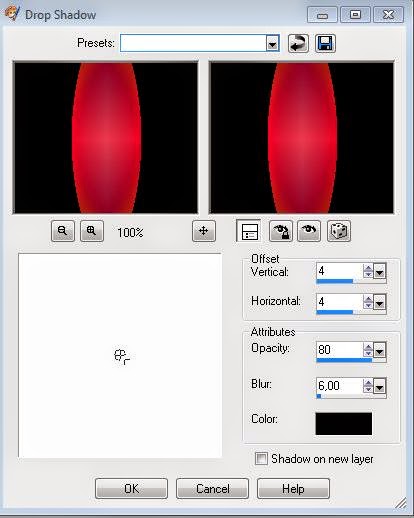
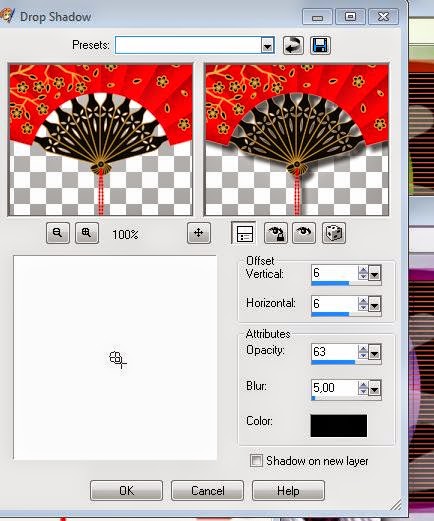
9-Effects- 3D Effects- Drop shadow
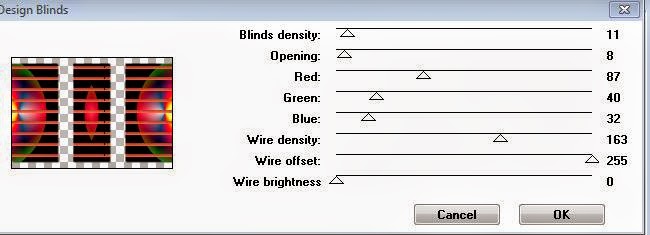
10- Effects-Sandflower- Design blind
11--İmage -Resize 90
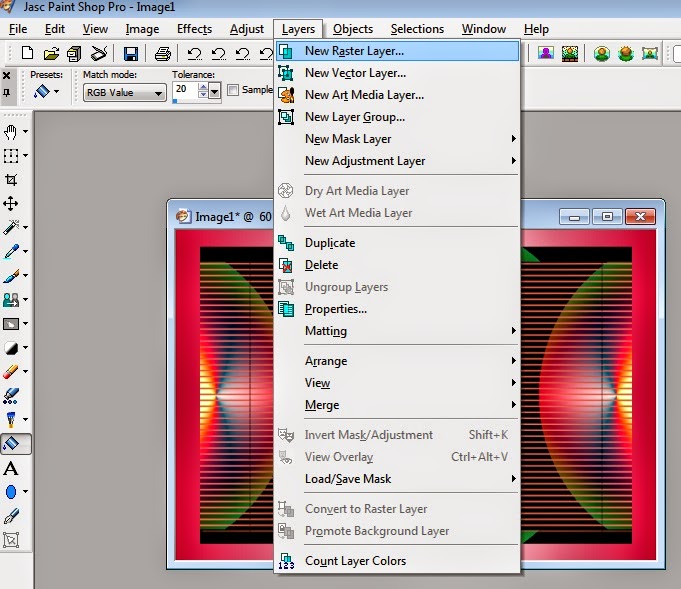
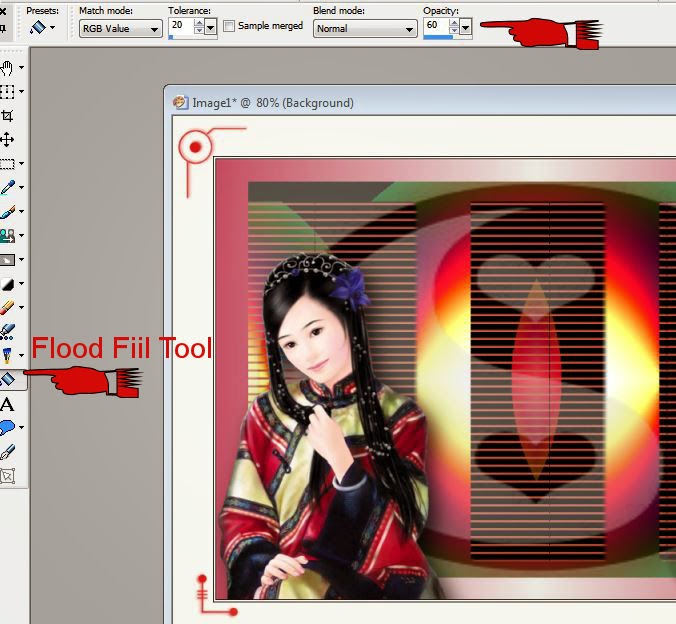
12-New raster layer
13-Flood Fill tool aracı ile background color: #f8f7f1 ( Light color)
Opacity: 60

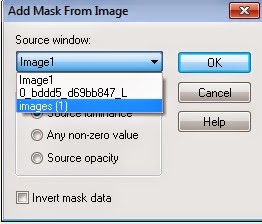
14-Open mask ( İmages(1)
Layers- New mask layer from image
15- Layers- Merge- Merge group
16- Effects- 3D effects- Drop shadow
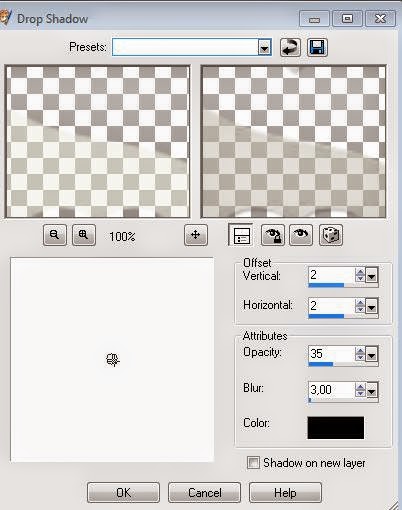
Opacity 60
17-Open woman tube Edit-copy
Edit paste as new layer
( İf you want / İmage-Resize a little )
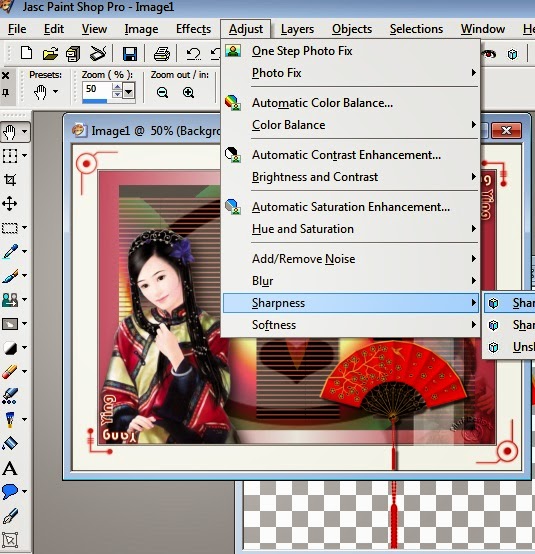
18-Adjust-Sharpness-Sharpen
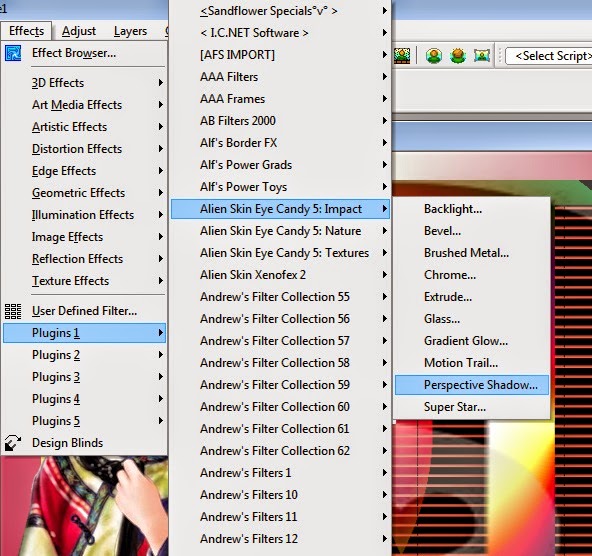
19-Effects--Alien Skin ( Eye Candy 5 İmpact )- Perspective shadow
Settings: Drop shadow, Blurry
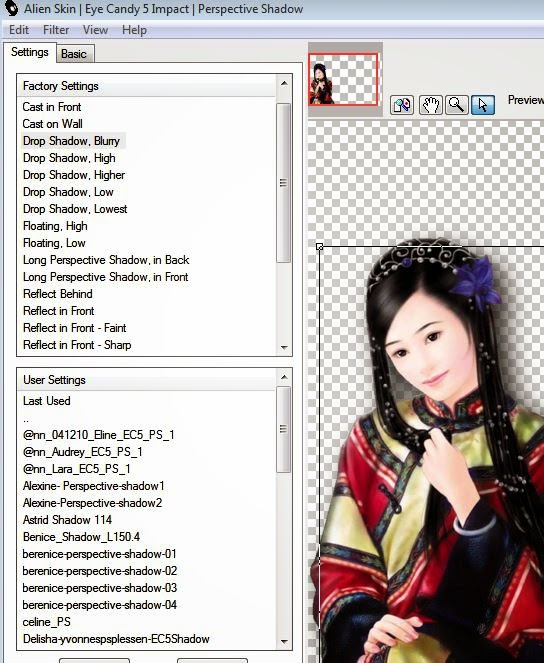
Basic:
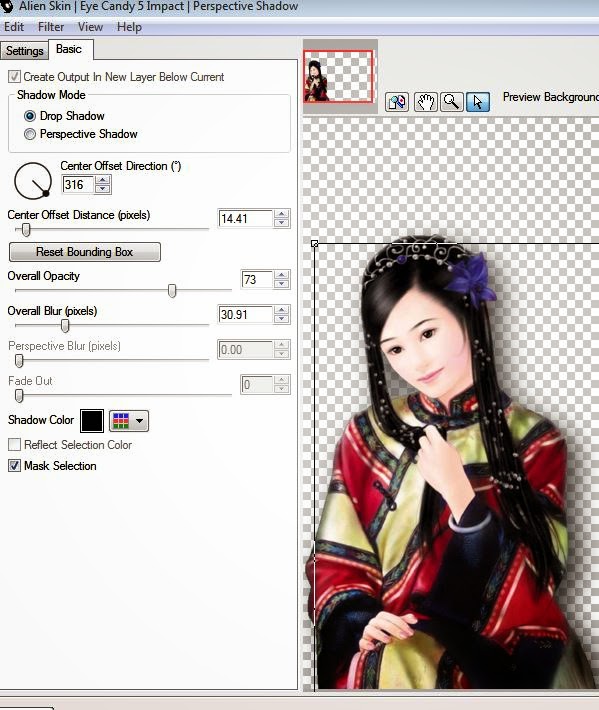
Click OK
20-Open couple tube.
Edit-copy
Edit- paste as new layer
Place the right side
( İf you want / İmage-Resize )
21- Blend mode: Burn or Multiply
Opacity 60
You are free… Make it how you want
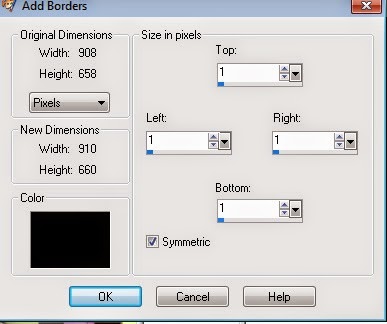
22- İmage- Add borders 1 px. black color

İmage add border 2 px. #f8f7f1 ( Light color)
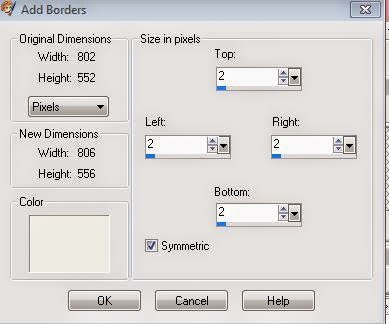
image add borders 1 px. black color
image add borders 50 px. #f8f7f1 ( Light color)
23-Layers-New raster layer
Background color: #b5012b ( Dark color)
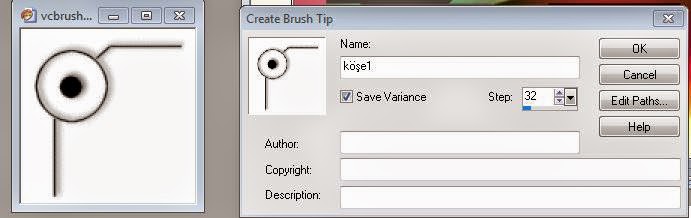
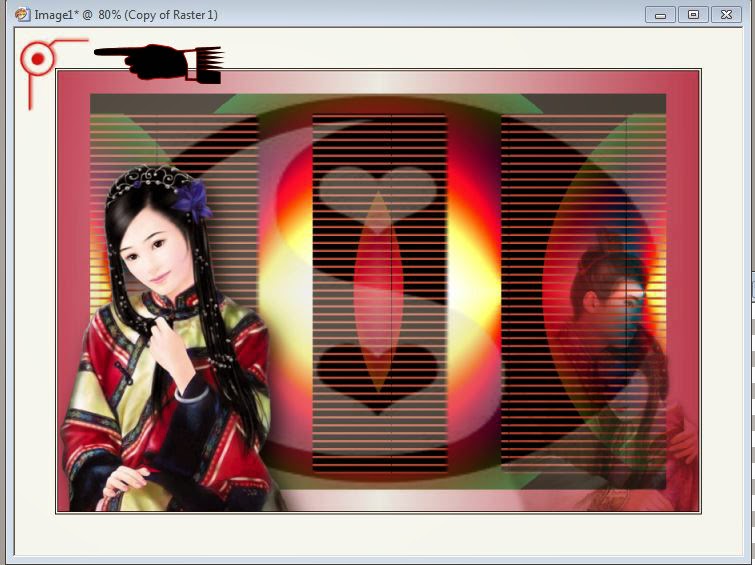
24-Paint Brush- Köşe 1 ( Corner 1)
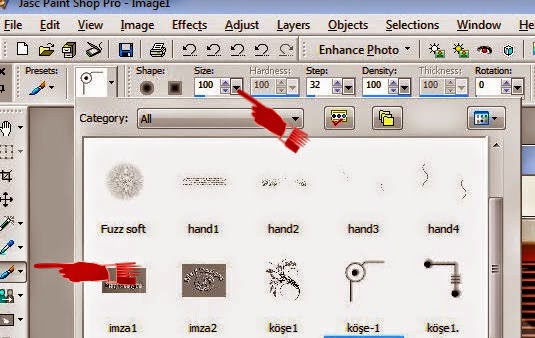
Click once in the upper left corner
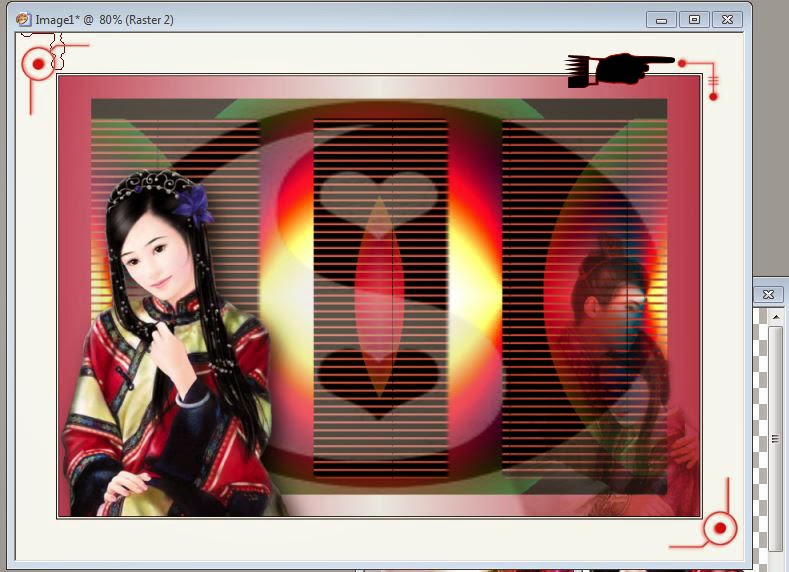
As you can see in the figure below
25- Layers- Duplicate Merge-Merge down
26-Layers- Duplicate
İmage- Mirror
İmage-Flip
Merge-Merge down
27-New raster layer
Paint Brush- Köşe-2 ( corner 2)
Click once in the upper right corner
As you can see in the figure below
28-Layers- Duplicate
Merge-Merge down
29- Layers- Duplicate
İmage- Mirror
İmage-Flip
Merge-Merge down
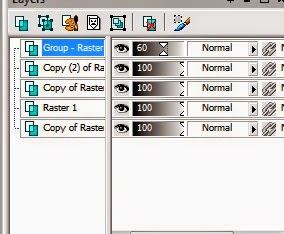
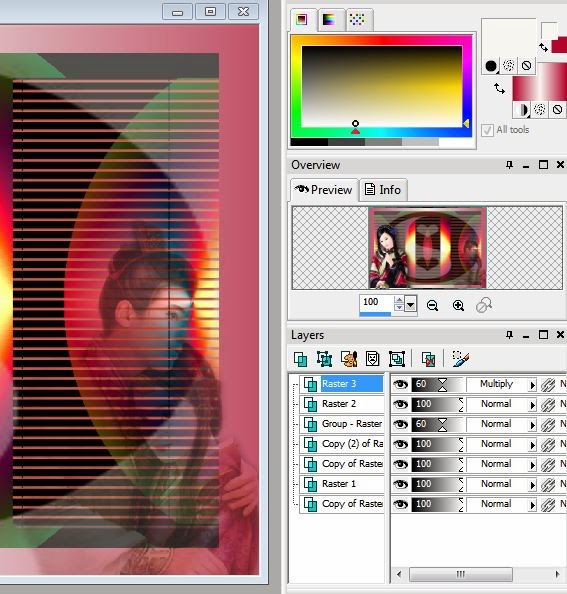
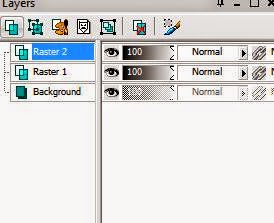
Your layers should be like:
30- Merge- Merge All (Flatten)

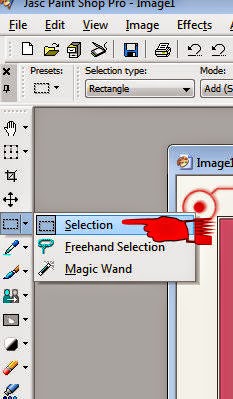
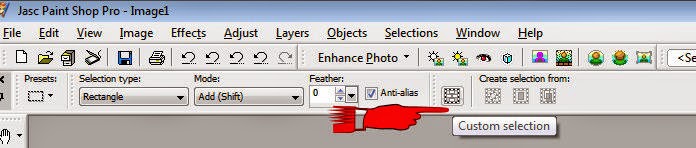
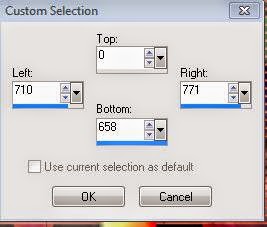
31-Selection
Custom selection
32- Layers-New raster layer ( Raster 3)
Flood Fill Tool / #f8f7f1 ( Light color)
With Opacity: 60
33- Selections-Select none
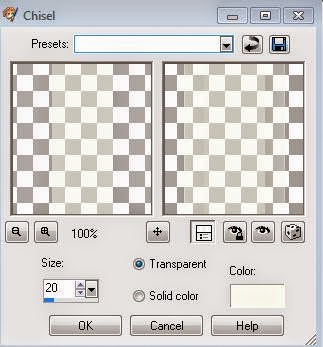
34-Effects-3D effects- Chisel
Color: #f8f7f1
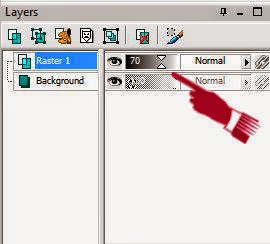
35- Opacity: 70
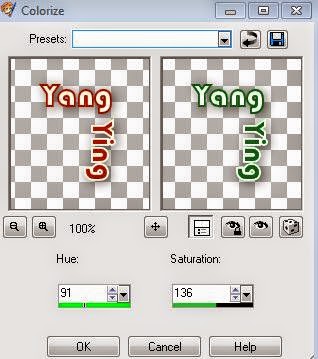
36- Open wordart
Edit-Copy
Edit-Paste as new layer
( If you need to change the color / Adjust- Hue and Saturation - Colorize … )
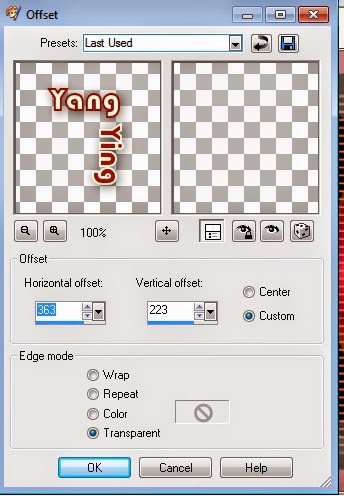
37-Effects-İmage effects- Offset
38- Layers-Duplicate
İmage-Mirror
İmage-Flip
39- Open Range ( Yelpaze) deco
Edit-copy
Click on the top layer

Edit-Paste As New Layer
40- İmage-Resize:60
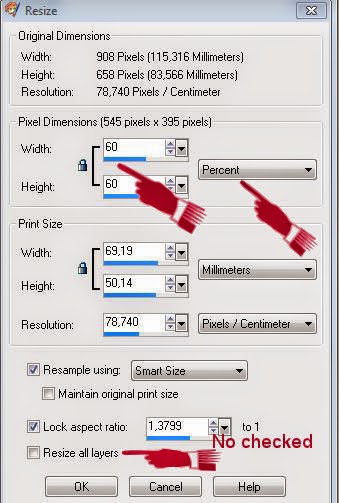
( You can resize according to your own material)
41-The lower right corner or a place you want to insert
42-Effects- 3D effects- Drop shadow
43-Add your name or watermarkt
44-İmage- Add borders- 1 px.black
45-İmage-Resize

46-Save as JPEG
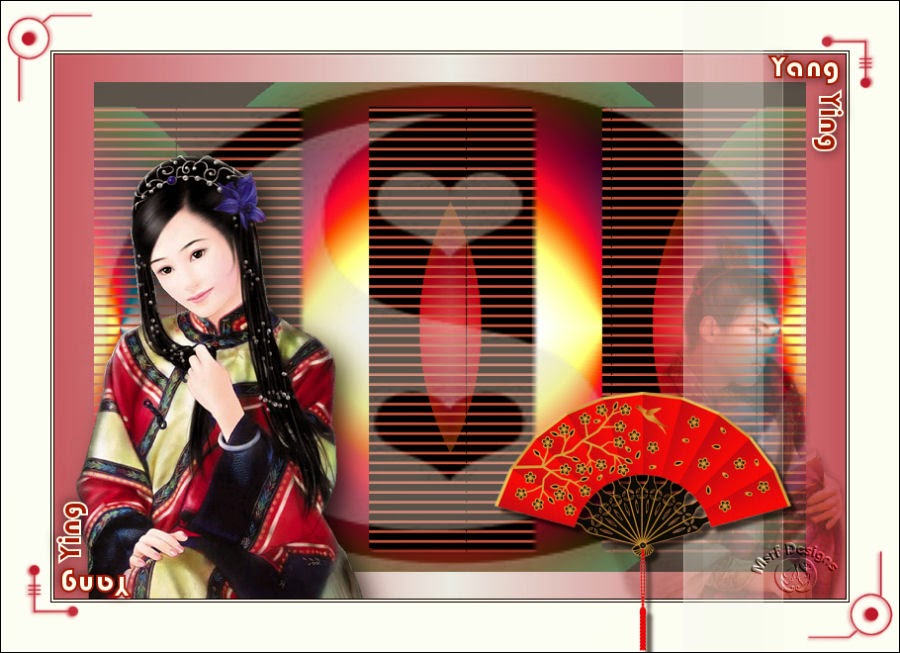
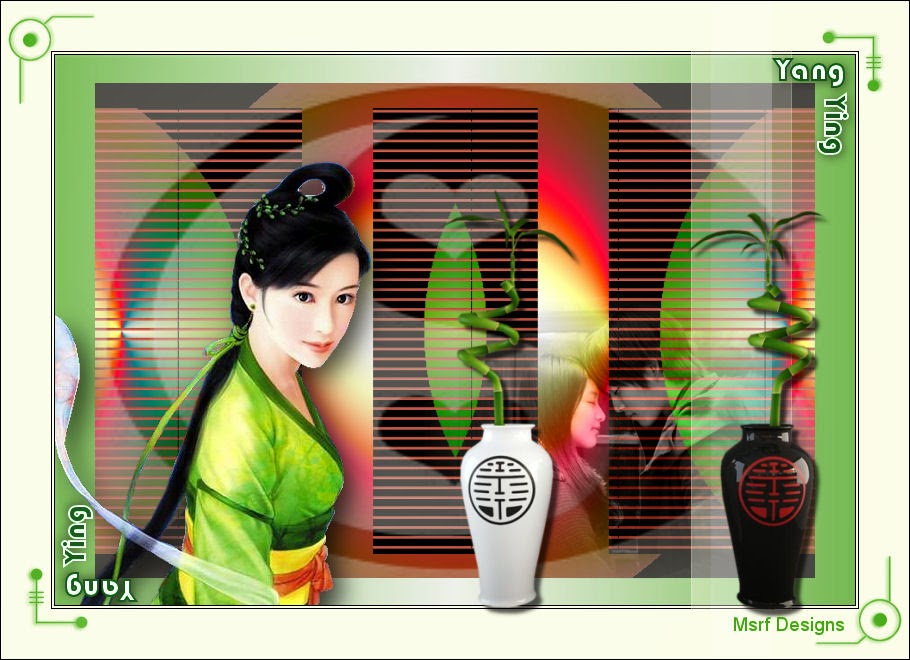
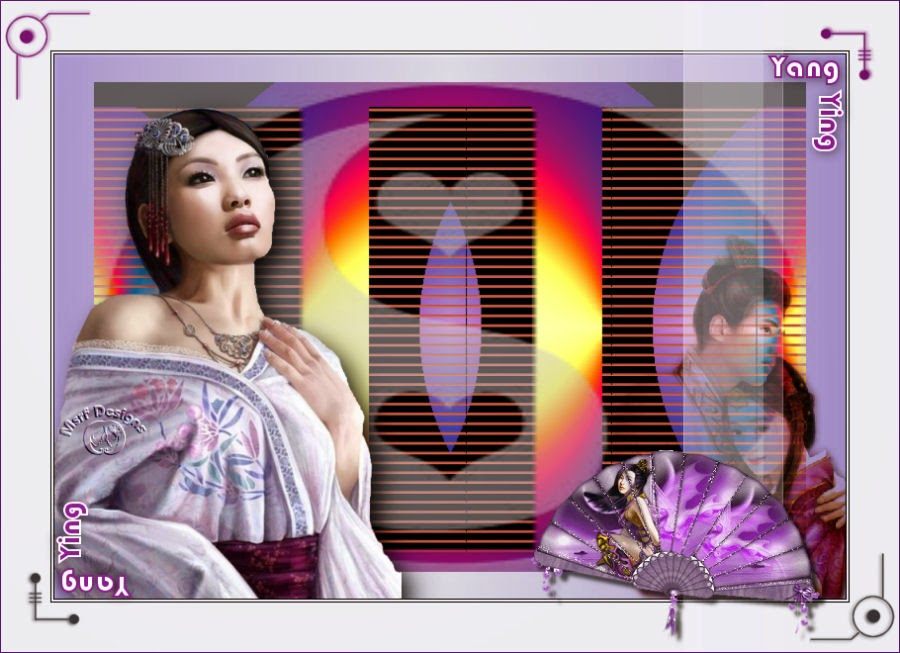
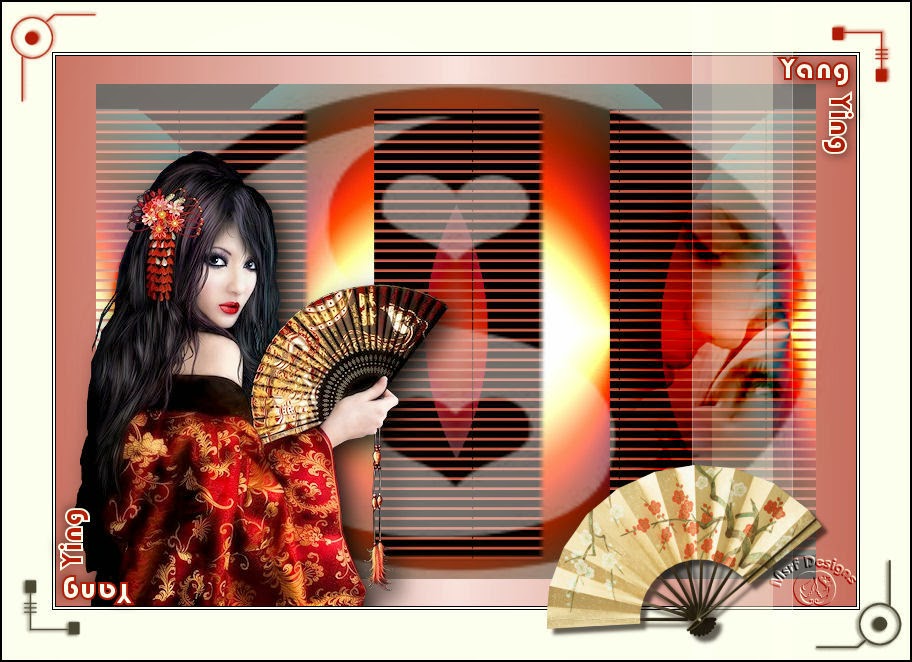
This is a result of work:
My another versions:
İf you wish you can post your result on my Facebook page:

I hope you enjoy
Thank you
Design and writing by Msrf Designs ( Müşerref Özdaş )

My friends versions:
Teşekkürler erdemir
Merci Franie
Franie 2. version
Thank you Altair
Thank you Janice
Thank you Brigittealice
|